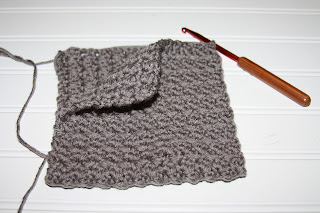
Chaos Stitch:
Chain an even number ( for this pocket I chose 24 stitches)
In second stitch from hook 1sc and 1dc, skip next stitch, repeat til end
ch 1 and turn skip stitch, in next stitch 1 sc and 1 dc, skip next stitch, repeat til end.
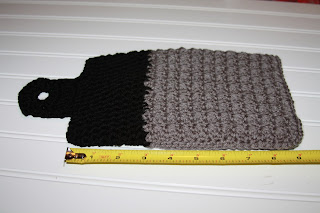
I continued making rows until the length measured 13 inches. The tablet I am making this for is 6 inches by 9 inches. This length needs to fold over making both sides of the pocket and leaving a bit of depth.
Holding the two parts together, I simply stitched them with a single crochet making sure to go through both folded parts at the same time.
It is important to do extra single crochet stitches in the corner so that it makes a nice curve without gathering.
I simply added rows of HDC until the length reaches 9 inches. I then slip stitch toward the middle of the pocket in this case it was 10 slip stitches. The loop attachment was made by doing 8 rows of 7 hdcs, followed by hdc in the next 2 stitches, chaining 3, skipping next three stitches, then hdc in next 2 stitches. I finished off the loop with another row of 7 hdcs. I then ran hdcs in each stitch around the entire top and loop of the pocket to make a nice clean edge.
Attach buttons for closure
Any embellishment can be added to the pocket. I made one for myself with a Dia De Los Meurtos skull on it. There are no tutorials that I could find to make a Day of the Dead skull, so perhaps that should be my next tutorial.


No comments:
Post a Comment