Friday, January 4, 2013

Crocheted Skull Embellishment

I don't have experience writing patterns, and this one is basically made by trial and error.  Post will be picture heavy to show how I worked it all out.  Enjoy!

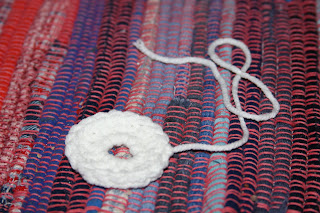
Chain 6 and slip stitch into first chain to make a circle


Make hdc into the circle you made with 12 stitches and slip stitch to join


 Chain 2, 2 hdc into stitch, join and tie off  and set aside leaving a 8-10 inch tail.  This is one eye socket.  Make another but do not tie off . . .


. . . on the second eye socket, continue a new round with 1 hdc in first stitch and 2 hdc in next.  Repeat until you are halfway around the socket . . . 


It is now time to join the other socket, leaving the tail facing the attaching socket, loop into a stitch from the second . . .


and begin repeating the 1 hdc , 2 hdc combination that you were doing on the first. 


When you are almost ready to meet the bottom of the first socket, chain 4 to leave a space open for the nose hole in the skull.   Finish the hdc pattern to the starting space, join with slip stitch and chain 2.


 Use the tail you left on the circle and a darning needle to sew the circled together in the middle,


. . . leaving the triangle open for the nose. 


Time for one more row of hdc aroudn the entire eye sockets.  This time, do 1 hdc in first stitch, 1 hdc in next stitch, and 2 hdc in the following.  Continue the 1 hdc, 1 hdc, and 2hdc pattern completely around both circles stopping at the beginning of the flat bottom.


At the bottom edge, 1hdc in each stitch until the start of the round.  Join with slip stitch and chain 3 and turn. 


Teeth row is made by crocheting 1 dc in the next 3 stitches, *chain 1, skip 1 stitch, dc in next*, repeat * to * twice, finish row with 2 more dc, chain 3 and turn.  


 Repeat entire row one more time, chain 2 and turn. 


1 hdc in each stitch following row.  Chain 2 turn and repeat one more row. 


Work dhc in each stitch around the skull.  This skull seemed a bit fat around the eye sockets in comparison to the mouth area so I decided to switch to single crochet around that portion.  Be sure to work extra stitches in the corners as needed so your work will lay flat.


Wednesday, January 2, 2013

Crocheted Tablet Pocket

I used the Chaos stitch to make a tablet cover for my Nexus 7inch.  After putting it on facebook, I had several people who asked to purchase one.  Let me lay out how I made one here.
 
Chaos Stitch: 

Chain an even number ( for this pocket I chose 24 stitches)

In second stitch from hook 1sc and 1dc, skip next stitch,  repeat til end

ch 1 and turn skip stitch, in next stitch 1 sc and 1 dc, skip next stitch, repeat til end.

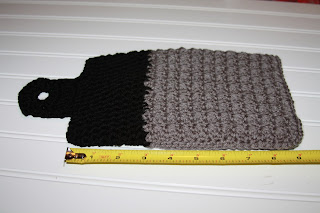
I continued making rows until the length measured 13 inches.  The tablet I am making this for is 6 inches by 9 inches.  This length needs to fold over making both sides of the pocket and leaving a bit of depth. 

 I then folded the length in half end to end.
 Holding the two parts together, I simply stitched them with a single crochet making sure to go through both folded parts at the same time.

It is important to do extra single crochet stitches in the corner so that it makes a nice curve without gathering. 

Once you stitch around 2 sides, you have a pocket.  Tie off and weave in ends.

It is time to add some black on the open top of the pocket.  I simply do half double crochet (hdc) stitches around the opening.  The stitches aren't perfectly level due to the scalloping on the edges of the chaos stitch, but I kind of like the variation. 


I simply added rows of HDC until the length reaches 9 inches.  I then slip stitch toward the middle of the pocket in this case it was 10 slip stitches.  The loop attachment was made by doing 8 rows of 7 hdcs, followed by  hdc in the next 2 stitches, chaining 3, skipping next three stitches, then hdc in next 2 stitches.  I finished off the loop with another row of 7 hdcs.  I then ran hdcs in each stitch around the entire top and loop of the pocket to make a nice clean edge.


Attach buttons for closure


Any embellishment can be added to the pocket. I made one for myself with a Dia De Los Meurtos skull on it.  There are no tutorials that I could find to make a Day of the Dead skull, so perhaps that should be my next tutorial.


Tuesday, January 1, 2013

Chaos Stitch


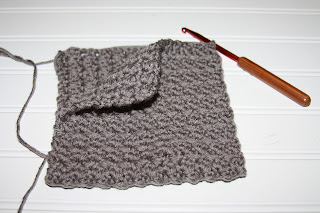
This is my newest favorite stitch.  I have no idea what it is really called, I call it  chaos.  This is the beginning of a Kindle pocket. 

Chaos Stitch: 

Chain an even number ( for this pocket I chose 24 stitches)

In second stitch from hook 1sc and 1dc, skip next stitch,  repeat til end

ch 1 and turn skip stitch, in next stitch 1 sc and 1 dc, skip next stitch, repeat til end.

This stitch works up fast and clean.  The edges, while looking a bit scallop-y are clean.  The stitch also creates a pretty sturdy weave.